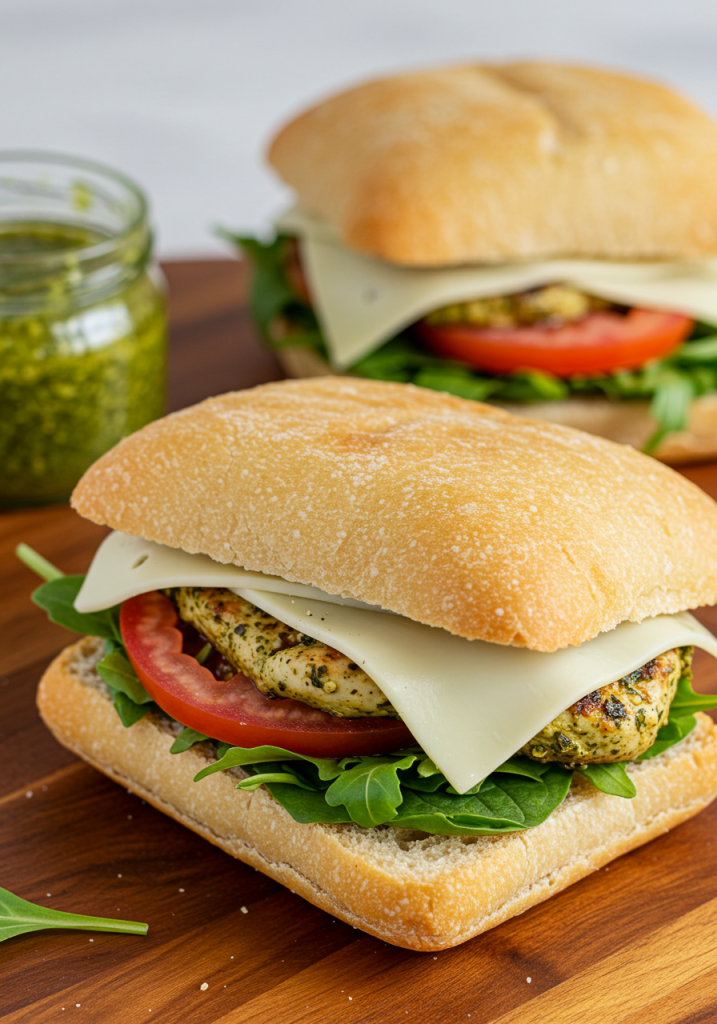
If you love a sandwich that’s packed with bold flavors, this Chicken Pesto Sandwich is for you! Juicy grilled chicken, creamy pesto, and melty cheese come together on a toasted bun for a meal that’s both satisfying and easy to make. Whether for lunch, dinner, or meal prep, this sandwich is a winner!
Why You’ll Love This Recipe
- Quick & Easy: Ready in under 30 minutes.
- Flavor-Packed: The pesto adds a fresh, herby taste.
- Perfect for Meal Prep: Make ahead and enjoy all week!
Ingredients You’ll Need
- Chicken breasts (2, boneless & skinless)
- Olive oil (2 tbsp)
- Salt & black pepper (to taste)
- Garlic powder (½ tsp)
- Italian seasoning (½ tsp)
- Pesto sauce (¼ cup)
- Provolone or mozzarella cheese (2 slices)
- Tomato (1, sliced)
- Arugula or spinach (½ cup)
- Ciabatta or sandwich rolls (2, sliced)
- Butter (1 tbsp, for toasting)
Tools You’ll Need
- Grill pan or skillet
- Knife & cutting board
- Small brush or spoon for pesto
How to Make Chicken Pesto Sandwich
Step 1: Season & Cook the Chicken
- Pound the chicken breasts to an even thickness.
- Rub with olive oil, salt, black pepper, garlic powder, and Italian seasoning.
- Heat a grill pan or skillet over medium-high heat.
- Cook the chicken for 5–6 minutes per side, or until fully cooked (165°F internal temp).
Step 2: Toast the Bread
5. Spread butter on the inside of the ciabatta rolls.
6. Toast on the skillet until golden and crispy (about 2 minutes).
Step 3: Assemble the Sandwich
7. Spread pesto on both sides of the toasted bread.
8. Add the cooked chicken, then top with cheese (let it melt slightly).
9. Layer on sliced tomatoes and arugula or spinach.
10. Close the sandwich and press gently.
Step 4: Serve & Enjoy!
11. Slice in half and serve warm with your favorite side.
Tips for the Best Sandwich
- Use Fresh Pesto: Homemade or high-quality store-bought pesto makes a big difference.
- Melt the Cheese: Cover the skillet for 1 minute after adding the cheese for extra melty goodness.
- Grill for Extra Flavor: Try grilling the sandwich panini-style for crispy edges.
What to Serve With It
- Sweet potato fries
- A side salad
- Roasted veggies
- A bowl of soup
Storing & Reheating
- Refrigerate: Wrap sandwiches in foil and store for up to 2 days.
- Reheat: Warm in a skillet or air fryer at 350°F until crispy.
Frequently Asked Questions
Can I use rotisserie chicken?
Yes! It’s a great shortcut—just mix shredded chicken with pesto before assembling.
What’s the best bread for this sandwich?
Ciabatta, sourdough, or a hearty baguette hold up well with the pesto and chicken.
Can I make it vegetarian?
Absolutely! Swap chicken for grilled portobello mushrooms or roasted eggplant.
Conclusion
This Chicken Pesto Sandwich is the perfect balance of juicy chicken, creamy pesto, and fresh toppings. It’s a simple, delicious meal that never disappoints!
Try it out and share your photos!
Preparation Time: 10 minutes
Cooking Time: 15 minutes
Cuisine: Italian-American
Nutritional Information (Per Serving):
Calories: 480 | Protein: 40g | Carbohydrates: 35g | Fat: 18g | Fiber: 3g | Sodium: 620mg

Chicken Pesto Sandwich
- Total Time: 25 minutes
Description
If you love a sandwich that’s packed with bold flavors, this Chicken Pesto Sandwich is for you! Juicy grilled chicken, creamy pesto, and melty cheese come together on a toasted bun for a meal that’s both satisfying and easy to make. Whether for lunch, dinner, or meal prep, this sandwich is a winner!
Ingredients
- Chicken breasts (2, boneless & skinless)
- Olive oil (2 tbsp)
- Salt & black pepper (to taste)
- Garlic powder (½ tsp)
- Italian seasoning (½ tsp)
- Pesto sauce (¼ cup)
- Provolone or mozzarella cheese (2 slices)
- Tomato (1, sliced)
- Arugula or spinach (½ cup)
- Ciabatta or sandwich rolls (2, sliced)
- Butter (1 tbsp, for toasting)
Instructions
Step 1: Season & Cook the Chicken
- Pound the chicken breasts to an even thickness.
- Rub with olive oil, salt, black pepper, garlic powder, and Italian seasoning.
- Heat a grill pan or skillet over medium-high heat.
- Cook the chicken for 5–6 minutes per side, or until fully cooked (165°F internal temp).
Step 2: Toast the Bread
5. Spread butter on the inside of the ciabatta rolls.
6. Toast on the skillet until golden and crispy (about 2 minutes).
Step 3: Assemble the Sandwich
7. Spread pesto on both sides of the toasted bread.
8. Add the cooked chicken, then top with cheese (let it melt slightly).
9. Layer on sliced tomatoes and arugula or spinach.
10. Close the sandwich and press gently.
Step 4: Serve & Enjoy!
11. Slice in half and serve warm with your favorite side.
Notes
- Use Fresh Pesto: Homemade or high-quality store-bought pesto makes a big difference.
- Melt the Cheese: Cover the skillet for 1 minute after adding the cheese for extra melty goodness.
- Grill for Extra Flavor: Try grilling the sandwich panini-style for crispy edges.
- Prep Time: 10 minutes
- Cook Time: 15 minutes
- Cuisine: Italian-American


